How To Do A Silk Press At Home Like A Professional

In 2020, we got a reboot on several aspects of our lives, from our social interactions and public hygiene to even our beauty routines. From that year on, we've seen a rise in the level of at-home self-service in the beauty industry. Press-on nails have become our go-tos; at-home self-care is a priority, and some of us have even learned to style and care for our natural hair. Among the styles we loved were braids, cornrows, and a unique flat-ironing process that some stylists of color consider a political rite of passage: a silk press.
Unlike chemical treatments like relaxers that break up the protein bonds in the strands, a silk press straightens your hair with heat instead of the "creamy crack." During a silk press, a flat iron and a sectioning comb are used to smoothen and straighten kinks or curls, thus achieving that ultra-shine, liquid look you know and love. While a professional hairstylist is best for this service, it's nice to be able to DIY your tresses. Thankfully, silk presses are pretty easy to do at home if you follow the proper steps and use the right tools.
Silk press vs. flat ironing vs. blowouts
We hate to break it to you, but none of these terms mean the same thing. While they all sound similar, there is one difference between getting a silk press, a regular blowout, and flat ironing your hair. While flat ironing involves using only a flat iron to straighten the strands, a blowout involves utilizing a blow dryer with a comb attachment or a hot air brush to style your hair however you please, straight or curly.
While blowouts work well on pretty much all hair textures and types, merely flat ironing on thick, kinky hair will not do much good. Flat ironing, however, is an excellent technique for people with softer, finer hair textures as it produces great results without the initial blow-drying those with kinkier hair textures have to go through. On the other hand, silk presses combine both techniques, where the hair is first blow-dried and then straightened with a flat iron.
Before you do a silk press at home

One thing professional hair stylists do not play with when it comes to a silk press is the prep phase — and you should not, either. To properly prepare for your silk press, you need to assess if your hair is fit for one. Whether you're frequently flat-ironing your hair or dyeing it different colors, repeated heat and chemical exposure can lead to overprocessed, damaged, or brittle hair.
Carrying out a treatment like a silk press on such hair will cause even more breakage and damage to your already fragile strands. To avoid this, ease up on other heat- and chemical-related treatments before going in with your silk press. You should also consistently moisturize your hair to prevent breakage and protect your ends.
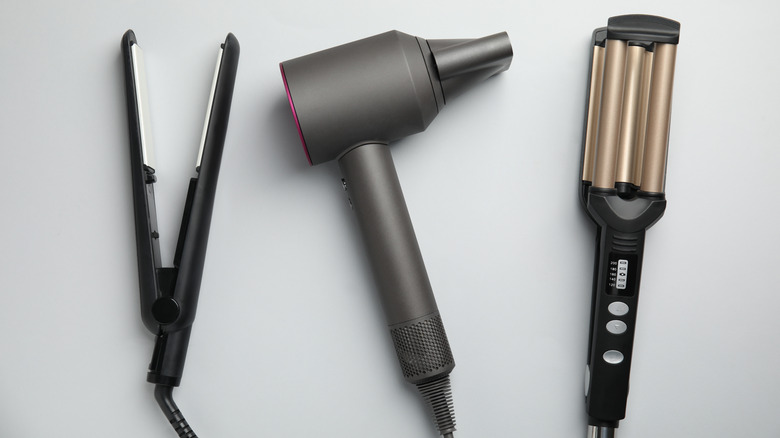
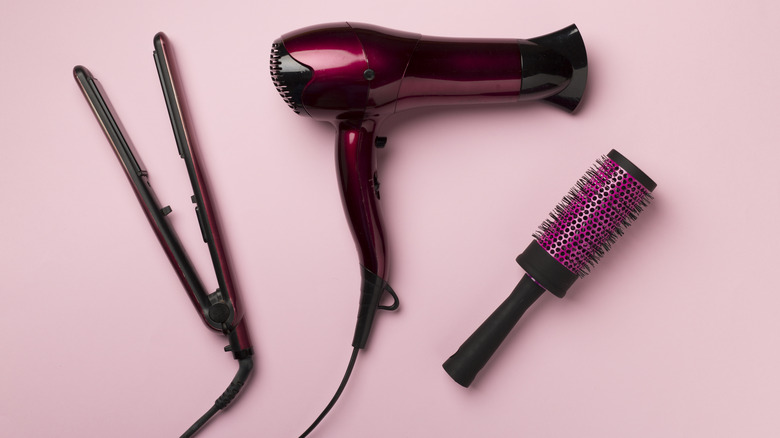
What products and tools you'll need for a silk press at home
If you ever grew up getting your day done at an ethnic salon, you'll know just how exciting –and sometimes painful– a traditional silk press can be. But we promise this at-home version comes with all of the shine and none of the trauma to your scalp. To achieve a silk press, you'll need:
- a blow dryer
- a flat iron
- a sectioning comb
- a round brush
- shampoo and conditioner
- leave-in conditioner
- heat protectant
Once you have these tools on your vanity, it's time to prep for your at-home silk press.
Wash, condition, and detangle your hair

If it's a new hairdo, it deserves a fresh wash. Unclean hair comes with dirt, debris, and oils, all of which, when left on your scalp and strands, can shorten how long your silk press lasts and even affect how smooth and lustrous your hair looks after the flat-ironing process. This is why it's essential to wash your hair with a clarifying shampoo and a hydrating conditioner before moving on to the next step: detangling.
Detangling can be a bothersome step, but it does guarantee you the smoothest and flattest lay possible, especially if you have thicker hair textures like 4A to 4C. Add some leave-in conditioner to your fresh-from-a-wash wet strands and divide them into small sections to detangle. The conditioner will provide hydration and slip to separate the strands easily. Then, gently run through your strands with either your fingers or a wide-toothed detangling comb, and apply more conditioner if needed. When you're done detangling, it's time to get into the heat, but with some protection first.
Apply heat protectant to your strands
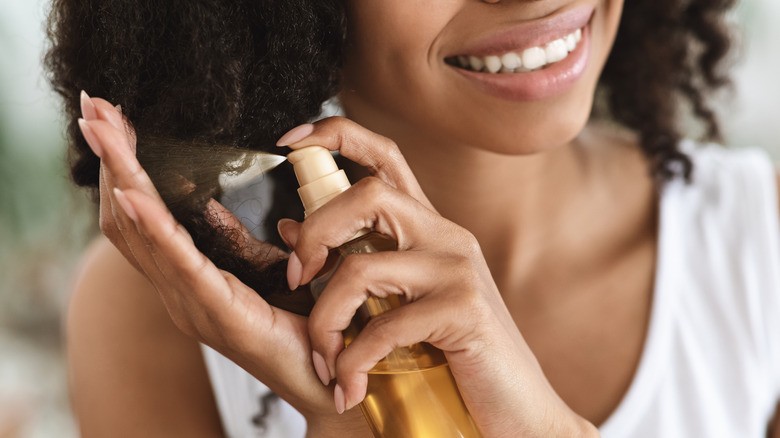
Remember what we said about heat being used to straighten your hair? Heat does this by breaking the protein bonds that make your curls as kinky and elastic as they are. But while doing this, excess heat can also damage your hair's cuticles, cause the moisture within your strands to evaporate, and cause breakage or split ends. To avoid extensive heat-induced damage while carrying out your silk press, apply a heat protectant to your hair before blow drying or flat-ironing.
Heat protectant works by creating a barrier between your hair and the heat. It also allows for the heat to be distributed more evenly around your strands, leading to less damage and a smoother lay (per Lab Muffin Beauty Science). Depending on the brand of heat protectant you're using, spray or run the product through your strands according to the instructions provided. Just be sure not to use too much, as some heat protectants typically contain silicones (an ingredient you should avoid in your haircare products), which can accumulate in your hair and give it a dull, heavy feel.
Blow dry your hair in sections
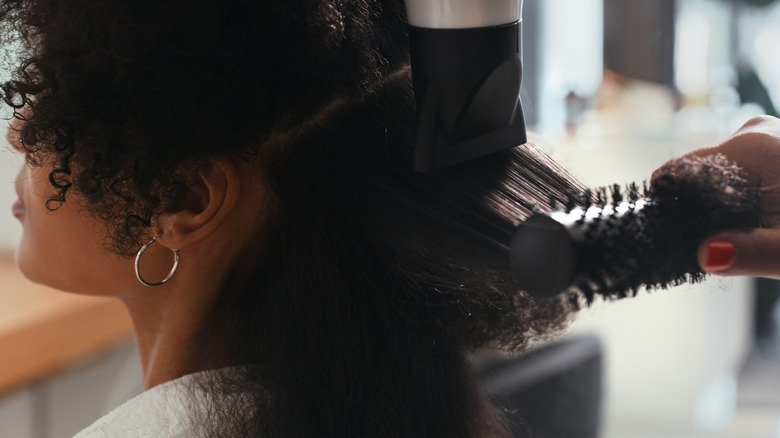
When you finish protecting your hair from the heat, part your hair into medium sections of about six to ten clumps and whip out your blow dryer. Blow drying in a silk press is one of two heat-involving steps, and you should do it right before you flat iron. Where flat ironing will give you the smooth, shiny lay that is typical with a silk press, blow drying straightens, detangles, and dries your hair to help the smoothening process. And believe us, the last thing you want to do is get a silk press on wet hair!
Working in small sections and from the back of your head, run your blow dryer from root to tip, closely following the nozzle with a round brush on your hair. Repeat this process twice for each section until you finish your head of hair. When you're done, part the small sections again, but this time for your flat-ironing process.
Flat iron with the chase method
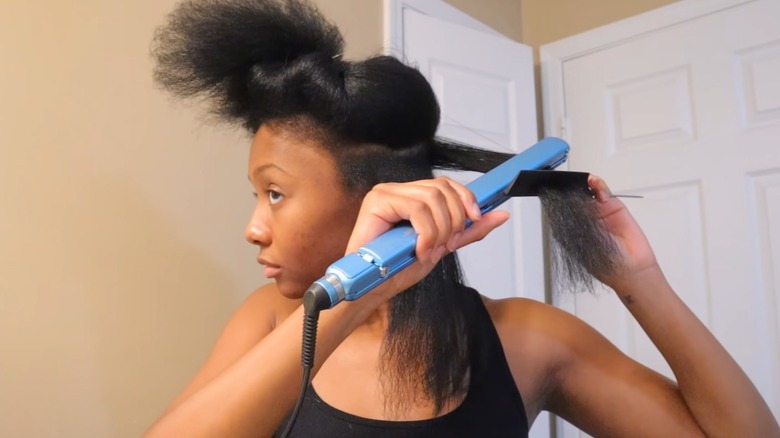
So far, you've washed, detangled, protected, and blow-dried. But you have yet to get to the heart of the silk press, which is the flat iron. Flat ironing is the key to this recipe, and the trick to achieving a perfect press with a flat iron is the chase method. The chase or comb chase method involves running a sectioning comb or a brush through the strands and pressing them with a flat iron right after. Doing this lets the hair straighten individually and lay as flat as possible.
So, separate your hair into thin horizontal sections, put in the sectioning comb, and drag it in front of the flat iron. Chase your comb by pressing the section between the flat iron plates from the root to the total length of the hair. For the best and healthiest results, limit the number of passes you make with the iron to one or two to avoid damage to your hair cuticle and ends.
Style your ends and finish with some hairspray
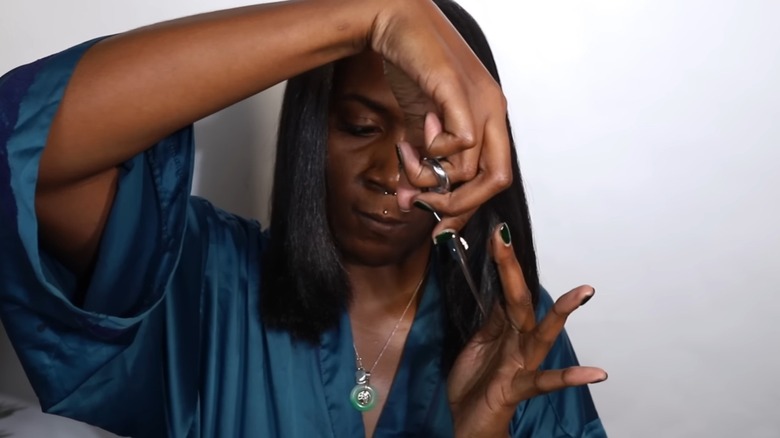
Now you have your shiny, silkiest silk press yet. But if you want to add more style and dimension, we recommend trimming and styling your ends. While this step is best done professionally, you can also trim your split ends with hair shears. Natural Girl Wigs recommends cutting about half an inch from your ends if you cannot correctly see and trim your split ends.
When you finish trimming, you can bump your ends inwards for a style-forward bob or outwards for a flipped-out look with a medium-heat curling iron. Once that's done, hold your silk press in place by spraying a generous amount of finishing hairspray, and voila, you have your very own at-home silk press.
How long will your silk press last?

One of our favorite things about silk presses isn't just about how they look but how long they last with proper maintenance too. While most hair experts agree that a typical silk press can last anywhere between one and three weeks, this time can be longer or shorter depending on how you take care of the silk press afterward.
To properly maintain your silk press, you must avoid contact with water. Just as your hair shrinks back after wash day, humidity in sweat or water can cause your silk press to revert to its kinky status upon contact. So, while you have a silk press on, avoid water touching your hair by using a plastic cap while you shower and tightly wrapping your hair if you need to exercise or use a sauna. Another way to maintain your silk press is by wrapping your hair with a silk bonnet or wrap before bedtime. A silk or satin bonnet, wrap, or pillowcase will reduce friction while you sleep and keep your hair moisturized and silky for longer.